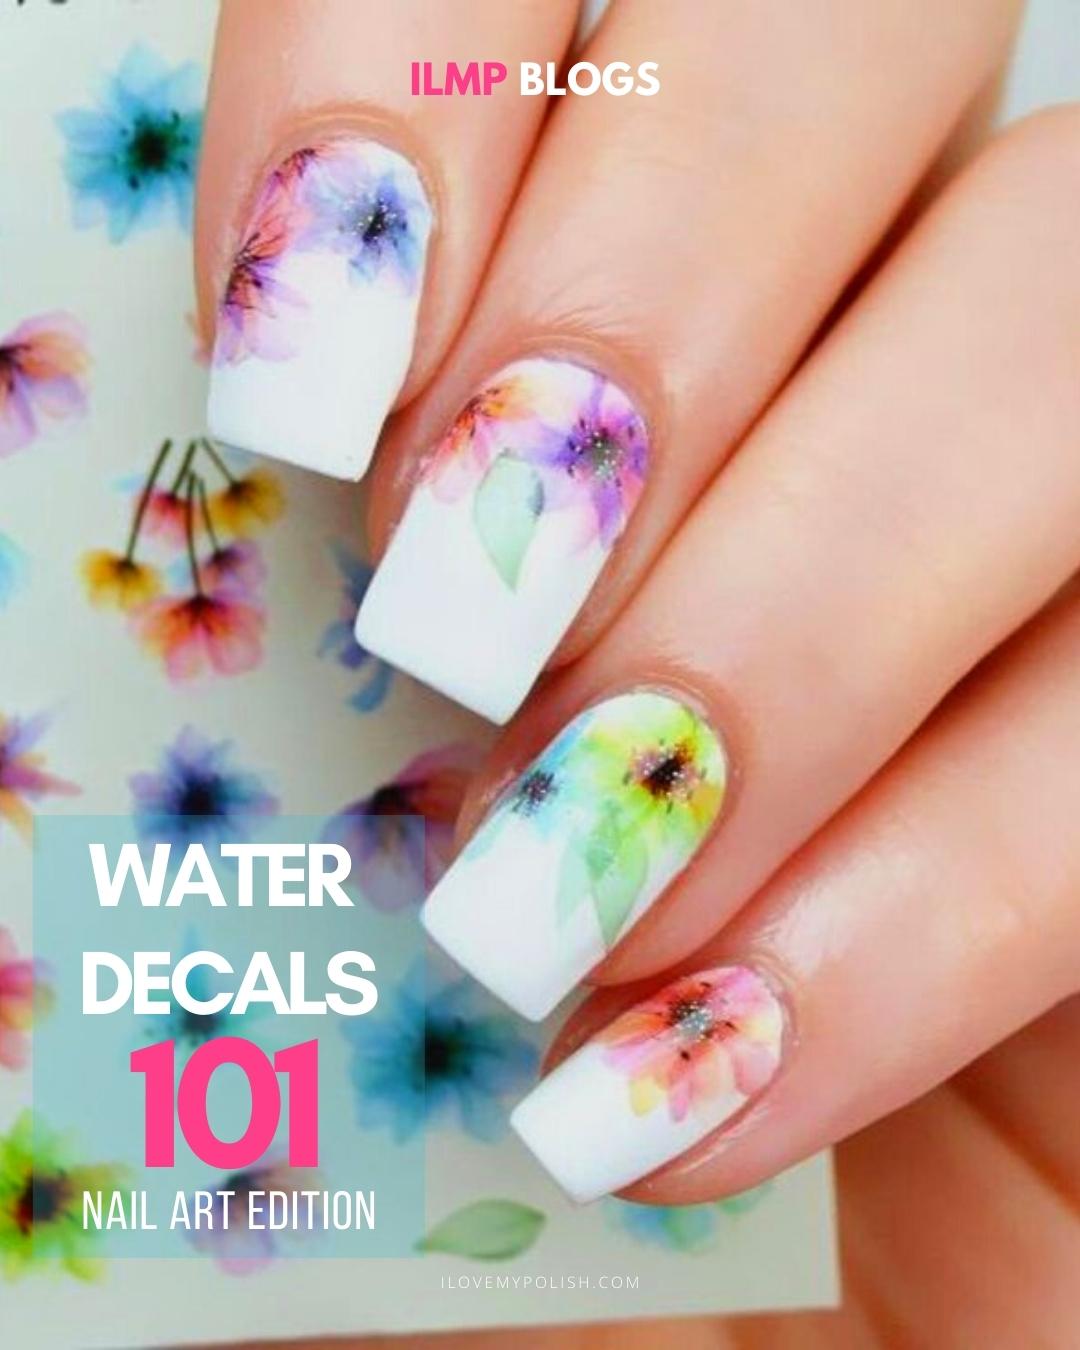
If you've shopped from ILMP before, use must have noticed a water decal sheet added as a freebie.
Water decals are basically water activated stickers. They are an inexpensive way to add an intricate design to your nail that would have been too hard to freehand. Water decals are a quick, inexpensive way to add oomph to your nails.
All you need is:
- A bowl of water
- Tweezers
- Water decal sheet
- Littmuss Crystal Top coat
STEPS:
- Apply a coat of your polish and dry completely, we're using two coats of Moraze Delicate White
- Take the decal that you want to put on your nails. Make sure you remove a transparent film on top of the decal card (sometimes it may not be present) and cut it to the size of your nail- no need to be precise about it)
- Using tweezers, carefully immerse the decal in a bowl of water.
- After 10-20 seconds, remove the decal from the water. Using tweezers, gently remove the paper backing
PRO TIP: if the paper does not come off easily, dip the decal in water again for 10-20 seconds

- Place the wet decal on your nail where you want it to go. Using a flat brush gently press the decal from center to outwards ensuring there are no air bubbles.
- Once the decal is dry, use the Littmuss Crystal Top coat to seal it in .
PRO TIP: to remove the decal, use any nail polish remover like Moraze’s Cosmic Fusion . Soak a cotton pad in nail polish remover and press it on the nail for a few seconds until the decal dissolves. Voila! You're now ready for your new look.
Decals are great for beginners and experts alike. Get a gorgeous nail art in 2 minutes and without breaking a buck! Check out our collection of floral decals